
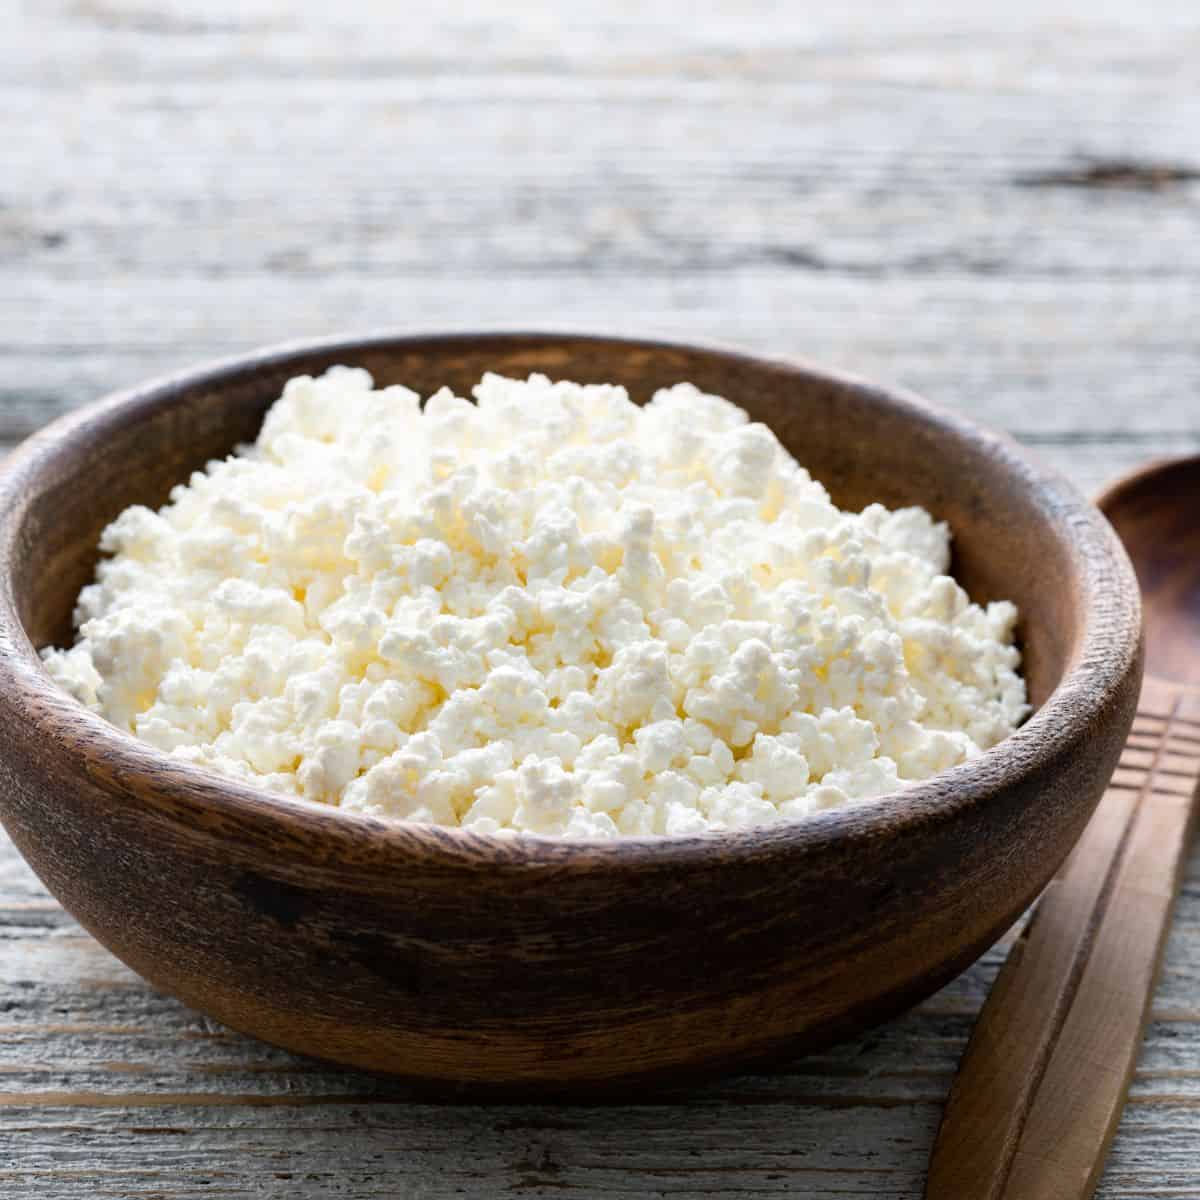
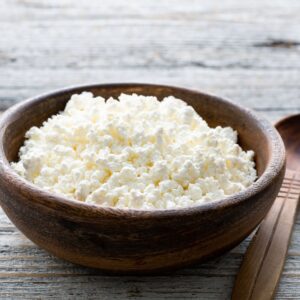
Imagine sinking your spoon into a cloud of pillowy-soft, impossibly fresh ricotta cheese. Not the grainy, store-bought kind, but a luxuriously smooth creation you made yourself, with just three basic ingredients and a bit of patience. This authentic ricotta cheese recipe is perfect for both sweet and savory dishes and can literally be made in under an hour!
Making ricotta at home is easier than you think
The only equipment you need is:
- Heavy bottomed pot
- Candy thermometer - (optional, but extremely helpful) It's good to keep an eye on the temperature so that the milk doesn't burn.
- Large bowl
- Slotted spoon- to separate the cheese curds from the leftover whey once they're finished cooking.
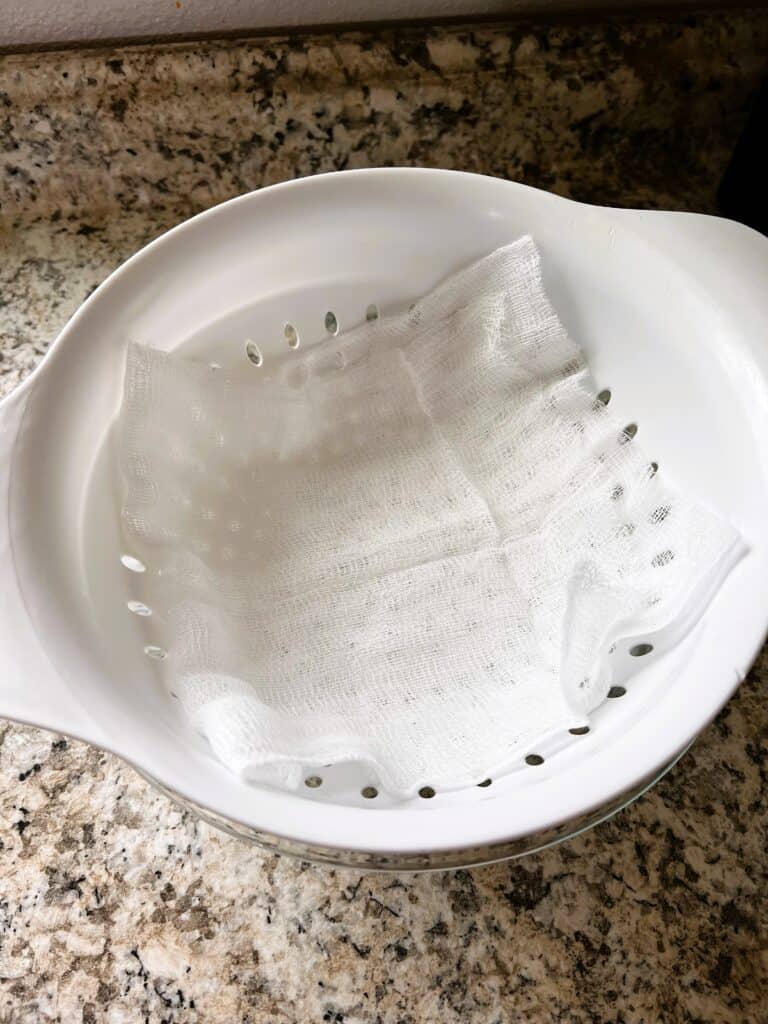
- Colander and cheese cloth- to drain your ricotta cheese.
I always give instructions with step-by-step photos in my posts, just in case some readers have questions. But if you are just here for the recipe, click the JUMP TO RECIPE tab under the title, and it will take you straight there. You can also print the recipe card with full instructions, or you can click one of the SHARE BUTTONS and save it for later!
Let's gather up the ingredients
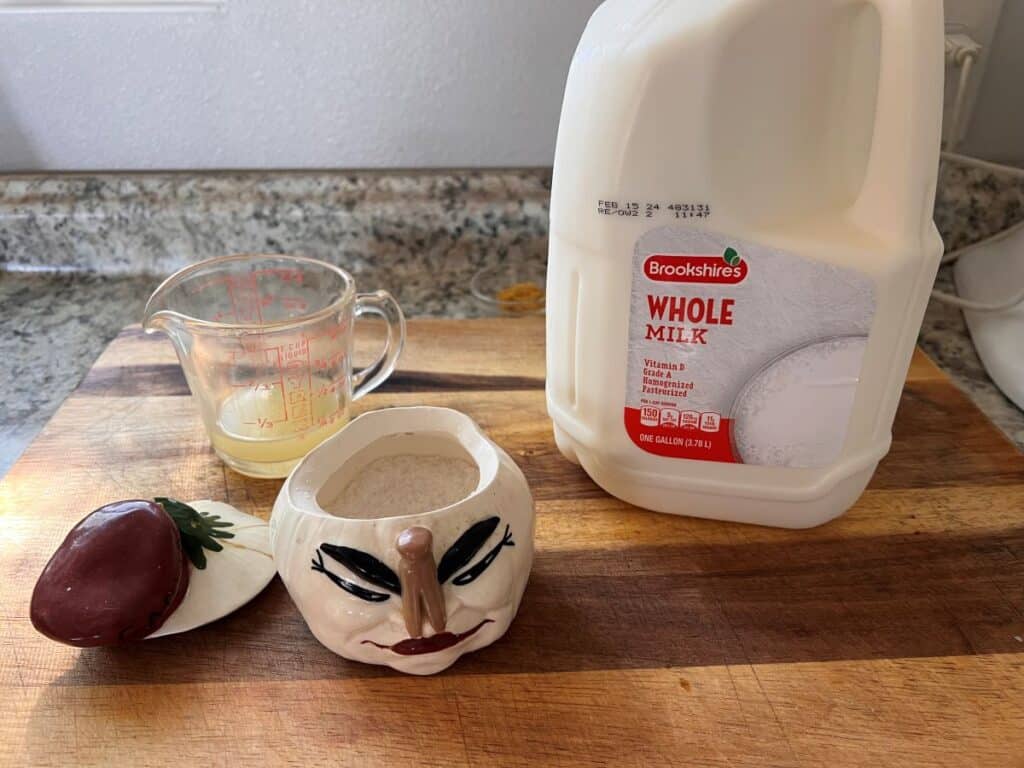
This homemade ricotta recipe only requires 3 simple ingredients- 3 ingredients and you have homemade cheese! Who knew?
- Whole milk- the fresher, the better! Look for fresh, high-quality milk for optimal results.
- Lemon juice or white vinegar- I prefer the flavor of fresh lemon juice, but either will work to curdle the milk.
- Salt- to enhance the natural flavors.
Now Let's get Cooking
Line a colander or a fine-mesh sieve with a large piece of lightly dampened cheesecloth that has been folded over itself a few times. Place the colander over a large bowl.
Add the milk and salt to a large heavy-bottomed pot.

Gently heat over medium-high heat, stirring frequently with a wooden spoon to prevent the milk from scorching on the bottom of the pan.
If you have a thermometer, we are aiming for a temperature between 180°F and 200°F. If you don't have a thermometer, look for little bubbles close to the edge of the pot, and the formation of a slight film.
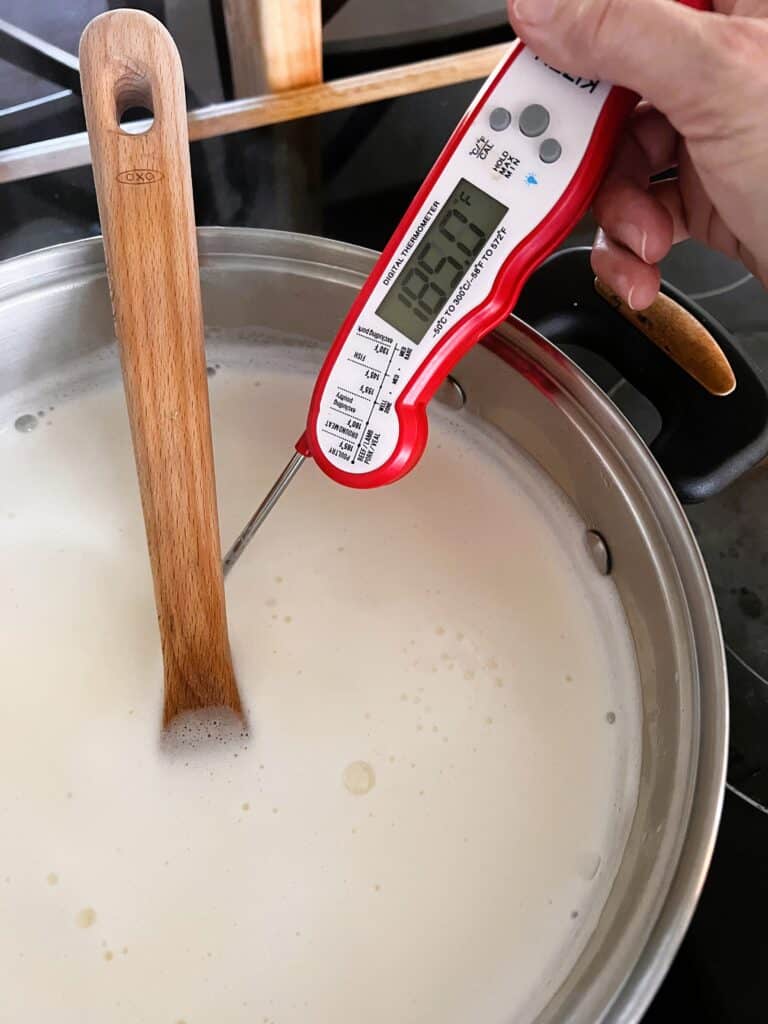
The milk will become foamy, but should never hit a rolling boil. This will take approximately 10-15 minutes. (Milk can boil over and scorch faster than you think, so watch it closely.)
Lower the heat to low. Now, slowly add the lemon juice (or vinegar).

Gently agitate the mixture for a minute or so. You will notice the ricotta curds separating from the whey (the yellowish leftover liquid). We want curds to form, so be delicate and try not to break them up too much.

Remove from the heat. Cover the pot and let it stand for about 20 minutes.
Using a slotted spoon, carefully transfer the curds into the cheesecloth, allowing the whey to drain. Let it drain for 10-30 minutes, depending on your desired ricotta consistency.


For a creamy consistency, don't let it drain too long. The longer it sits, the drier and thicker it will be.
Experiment with it. That's part of the joy of cooking! Take some out at the 10-minute point, some at 20, and let the rest drain for 45 minutes to an hour to see which way you prefer it.
Transfer the homemade ricotta cheese to a bowl, season with salt to taste, and stir gently. Your fresh ricotta is ready to enjoy!
Use immediately or refrigerate in an airtight container for 3-4 days.
Tips for success
- DO NOT use ultra-pasteurized milk. For cheesemaking, whey proteins play a key role in forming curds. Regular pasteurization leaves enough of these proteins intact. However, ultra-pasteurization denatures them more significantly, impacting their ability to bind and form proper curds.
- For a creamier ricotta, substitute a cup of heavy cream for one of the cups of milk.
- You could use citric acid in place of the lemon juice or vinegar. Dissolve the citric acid in a small amount of water before adding it to the milk. This ensures even distribution and prevents clumping. As a general rule, you can use around ¼ teaspoon of citric acid per cup of milk.
Frequently asked questions
How to eat ricotta cheese?
The possibilities are endless!
- Make Lemon Ricotta Pancakes with a dollop of homemade Lemon Curd.
- Mix it into fresh pasta.
- Spread it on toasted bread with a drizzle of olive oil, Roasted Garlic, and fresh herbs.
- Mix it into creamy dips.
- Bake it into a decadent Italian Ricotta Cake with Chocolate Chips.
- It's also an amazing addition to savory recipes like lasagna and stuffed shells, or even homemade ravioli.
How to freeze ricotta cheese?
Use airtight freezer-safe containers or freezer bags. Squeeze out as much air as possible from the bags before sealing to prevent freezer burn. Labeling the containers with the date is also helpful. Place the containers or bags in the coldest part of your freezer for quick freezing. This helps maintain the texture and prevents large ice crystals from forming.
Just keep in mind that freezing will change the taste and texture, so I don't recommend it.
Why is my homemade ricotta rubbery?
There are a few reasons why your homemade ricotta might be rubbery. Here are the most common culprits:
1. Overheating the milk: Ricotta curds should form gently, not with a boil. If the milk gets too hot, the curds will toughen and become rubbery. Aim for a gentle simmer around 180°F
2. Adding acid too quickly: The acid (lemon juice, vinegar, etc.) curdles the milk, forming the ricotta. Adding it too fast can shock the proteins, resulting in larger, rubbery curds. Gradually drizzle it in and gently stir until the curds separate from the whey.
3. Over-stirring: Stirring too much, especially after adding the acid, can tighten the curds and make them rubbery. Be gentle and avoid overworking the mixture.
4. Not enough acid: If you don't use enough acid, the curds won't separate properly, leaving you with a rubbery texture. Adjust the amount of acid according to your recipe and the acidity of your milk.
5. Using the wrong milk: Ultra-pasteurized milk doesn't curdle as well as regular pasteurized milk. Opt for whole milk with good quality and fat content for best results.
Additional tips:
- Let the curds rest for 15-20 minutes after adding the acid before straining. This allows the curds to firm up properly.
- Don't press the curds too hard while straining, as this can squeeze out excess moisture and leave you with dry, rubbery ricotta.
- Use your ricotta fresh within a few days for the best texture and flavor.
Remember, practice makes perfect! Don't be discouraged if your first attempt isn't just right. Embrace the experience and enjoy the satisfaction of creating delicious creamy ricotta from scratch.
Once you've mastered this basic recipe, you can experiment with different milks, herbs, and spices to create unique ricotta variations.
You may also like


We are empty nesters living in our RV full-time. If you are like us and cooking for two, this recipe can easily be cut in half.
It's seriously so easy to make your own ricotta. You may never purchase it from the grocery store again!
DID YOU MAKE THIS RECIPE?
If you made this creamy homemade ricotta, I'd love to know how it turned out! Please let me know by leaving a review below. Or snap a picture and tag me on Facebook.
As always, I will be back next week with more delicious recipes from my RV kitchen to yours!
This post may contain affiliate links. Read my full disclosure policy.
Learn how to get Amazon deliveries straight to your RV.
Easy Authentic Ricotta Cheese Recipe
Equipment
- Heavy Bottomed Pot
- Candy thermometer optional, but extrememly helpful
- Slotted spoon
- Colander
- Large bowl
- Cheesecloth
Ingredients
- 8 cups whole milk
- 1½ teaspoon salt
- 3 tablespoons freshly squeezed lemon juice or white vinegar
Instructions
- Line a colander or a fine-mesh sieve with a large piece of lightly dampened cheesecloth that has been folded over itself a few times. Place the colander over a large bowl.
- Add the milk and salt to a large heavy-bottomed pot.
- Gently heat over medium-high heat, stirring frequently with a wooden spoon to prevent the milk from scorching on the bottom of the pan.
- If you have a thermometer, we are aiming for a temperature between 180°F and 190°F. If you do not have a thermometer, look for little bubbles close to the edge of the pot, and the formation of a slight film. The milk will become foamy, but should never hit a rolling boil. This will take approximately 10-15 minutes. Milk can boil and scorch faster than you think so just have a little patience and watch it closely.
- Lower the heat to low.
- Slowly add the lemon juice (or vinegar).
- Gently agitate the mixture for a minute or so. You will notice the ricotta curds separating from the whey (the yellowish leftover liquid).
- Remove from the heat.
- Cover the pot and let stand for about 20 minutes.
- Using a slotted spoon, carefully transfer the curds into the cheesecloth, allowing the whey to drain. Let it drain for 10 -60 minutes, depending on your desired ricotta consistency. For a creamy consistency don't let it drain too long. The longer it sits, the drier and thicker it will be.
- Transfer the homemade ricotta cheese to a bowl, season with salt to taste, and stir gently.
- Use immediately or refrigerate in an airtight container for 3-4 days.


MacKenzie says
I just added all the ingredients to my cart. This recipe is super easy to follow. Can’t wait to try
veenaazmanov says
Homemade cheese sounds so happening. This is so quick and easy to make. Have to give this a try.
Kristine says
I had no idea this was doable at home. Your instructions were so easy to follow and the ricotta came out wonderful!
Kimberly says
Cheesemaking is so much fun. I started really getting into it a few years ago but then stopped because I just didn't have the time. Thanks for the reminder that some cheeses are so quick to make. There really is no good excuse not to make your own ricotta - it's quick and easy, tastes better, and is cheaper to make!
Holly Coppedge says
Me too! I love making cheese. I used to do it with my kids all the time and I just got out of the habit when they grew up. I am going to start doing it more often.
DK says
Wow - I learned so much with this recipe! Who knew making ricotta cheese was so easy to do. Thanks for the tips!
Megan says
My gramma used to make homemade ricotta cheese but I never got her recipe. I thought I'd give this one a try and it was so easy, used it in my lasagna recipe and it was absolutely delicious!
Holly Coppedge says
Once I discovered how easy it was, I make it all the time now.
Heather says
I was looking for a way to make my lasagna more authentic when I came across your recipe. I added it to my homemade lasagna and it was perfect!
Holly Coppedge says
I'm so glad you enjoyed it 🙂
Monique says
Tried this recipe and it turned out absolutely delicious. The creamy texture and subtle tanginess were perfect. I used it in lasagna and it was so tasty. I'll be using this recipe from now on!
Khrys says
I had no idea making authentic ricotta cheese at home was so simple! If I'd known sooner, I wouldn't have bought it from the store. It's perfect for my stuffed shells. Glad I found this recipe. Thanks!
Holly Coppedge says
Right?! It's so easy and fun too 🙂
Meredith says
So happy to finally find a ricotta cheese recipe that's so easy to follow! Nailed it on my first try and they came out perfect! Will be making my own ricotta cheese from now on!
Holly Coppedge says
Love it!
Lucy Carbaugh says
It is the best Ricotta that I have ever tasted, you can eat it just like it is, she make everything with so much love and passion, keep it up girl!
Scott says
Not real ricotta. Ricotta either made from whole Sheep or goats milk. Look it.