
Rice pilaf is one of those sides that makes any meal feel more complete. It's buttery, fluffy, and just a little more special than plain white rice, but it doesn't need to be complicated. This version keeps things simple with rice, orzo, onion, and garlic, all cooked together in the Instant Pot or Ninja Foodi pressure cooker for an easy, one-pot side dish. This Pressure Cooker Rice Pilaf is the kind of recipe I lean on often-quick to make, easy to scale for two or more, and perfect when I don't want a lot of dishes at the end of the night.

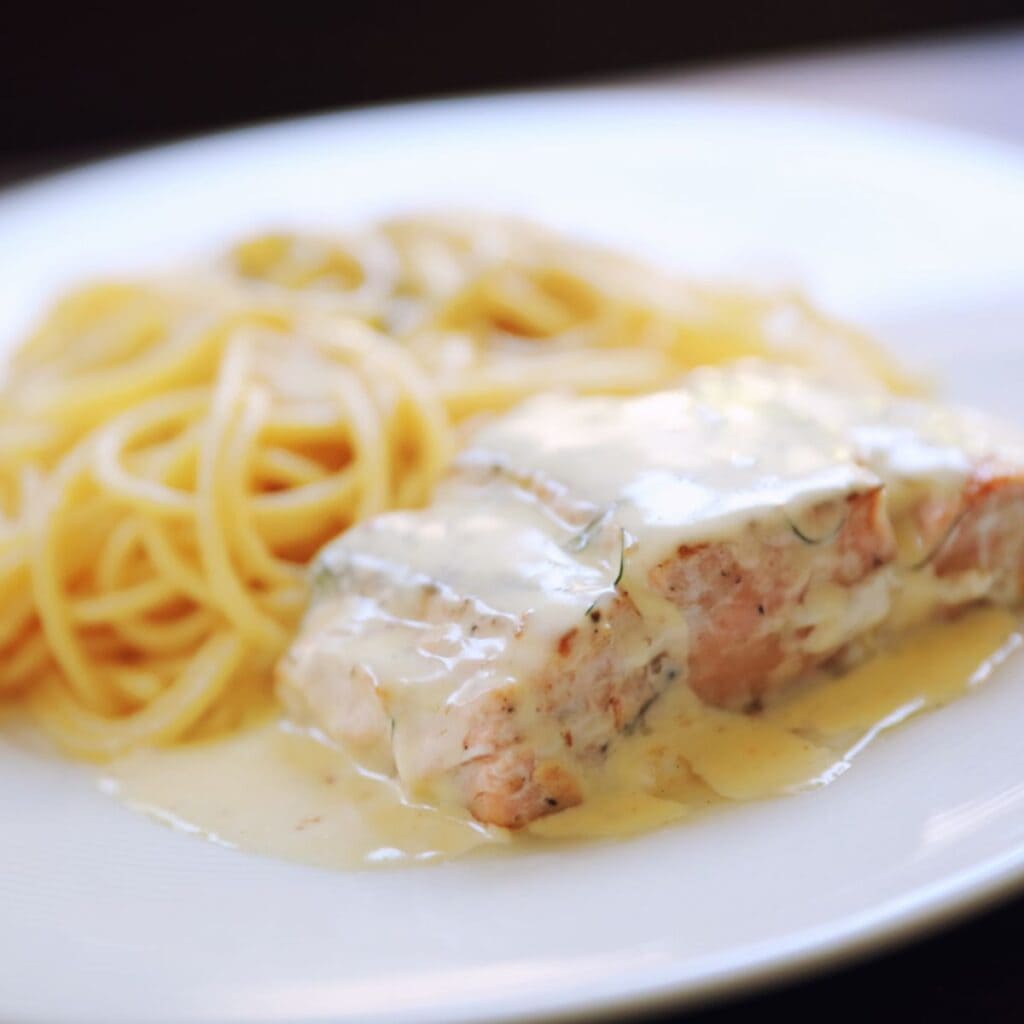
Try serving this rice side dish with my Roasted Chicken or Baked Salmon for a simple, well-rounded meal.

I LOVE my Ninja Foodi Air Fryer Pressure Cooker Combo. It's seriously one of my favorite kitchen tools, especially for RV living. When you're cooking in a small space, having one appliance that can do it all-pressure cook, air fry, steam, bake, broil, and more-is a total game changer. It saves space, cuts down on clutter, and allows me to create just about anything without hauling out a bunch of gear.
What Readers Are Saying
In the comments, folks are loving how this one checks all the boxes:
"Easy to make and delicious! It's a game‑changer for weeknight meals."
"This rice was delicious. So simple to make and it really will go with anything! Beautifully fluffy too."
"Quick to make, minimal cleanup. A new household favorite and will take to our camping trip soon!"
Why You'll Love This Easy Rice Pilaf Recipe
- One-pot wonder - Rice, orzo, and seasonings all cook together in the pressure cooker.
- Simple ingredients - You probably have everything on hand already.
- Full of flavor - Toasted orzo and onion add richness that plain rice just can't deliver.
- Perfect for RV cooking - Minimal cleanup, maximum flavor.
What If I Don't Have a Ninja Foodi?
Any electric pressure cooker will work for this recipe, whether it's an Instant Pot or another brand. The only thing you'll want to make sure of is that your cooker has a sauté function-that step really builds flavor. If yours doesn't, no problem. You can make this recipe on the stovetop instead.
To do that, use a wide pan with a tight-fitting lid. Follow the same steps up to the pressure cooking part, then bring the liquid to a boil. Cover, reduce the heat to low, and let it cook for about 20 minutes. Remove from the heat and fluff the rice with a fork.
And if you're cooking on an RV stovetop, here's a tip from experience: sometimes the flame won't go low enough, and you might end up with a crunchy layer at the bottom. Don't stress-just fluff the rice from the top and leave the bottom alone. It'll still taste great.
Works Great in RV Kitchens (or any kitchen)
One of the best parts about making rice in a pressure cooker is how much time it saves. Thanks to the steam and pressure, it cooks in a fraction of the time compared to the stovetop or even a rice cooker.
There's no waiting around for water to boil, no babysitting a pot, and no worrying about boil-overs or scorched bottoms-something RV stoves are especially notorious for.
Just set the timer, walk away, and let the pressure cooker do the work. Follow the steps, and you'll have fluffy, perfectly cooked rice pilaf every single time.
What is the Best Rice for Pilaf?
I make mine with BEN'S ORIGINAL™ Parboiled Long Grain White Rice, but there are many variations you could try. Just make sure to follow the directions on your package so you know exactly how much liquid to use and how long to cook it. Some good options would be...
- Brown Rice
- Basmati Rice
- Jasmine Rice
- Wild Rice
Learn more about different Types of Rice
Let's Gather Up the Ingredients

- Long Grain White Rice- Rinsed. When you rinse or soak white rice, it becomes less sticky so that the kernels separate and get more fluffy when you cook them.
- Butter- You could also use oil, but I love the nutty flavor browned butter gives to this dish.
- Orzo- You could also use broken spaghetti or vermicelli
- Water
- Knorr Chicken Flavored Bouillon- Add two teaspoons to the water to make a flavorful broth.
- Onions and Garlic- These aromatics are a staple and build great flavor.
- Spices- I used salt, pepper, and paprika, but the sky is the limit. Try turmeric or cumin for a Middle Eastern flair. You could add a bay leaf, oregano, thyme, or spice it up with some red pepper flakes!
- Fresh Parsley and Scallions- To make it beautiful and to add brightness to the dish.
How to Make Pressure Cooker Rice Pilaf
Turn on the Instant Pot or Ninja Foodi and press the "Sauté" button. Add the butter to the pot.

Once the butter has melted, add the chopped onions and saute for 2-3 minutes or until the onions are translucent. Stir in the orzo and stir continuously until it starts to turn golden brown.
Tips for Success: Make sure that you are using a wooden or silicone spoon. Never use metal utensils in your pressure cooker. They will scratch the liner, ruining the non-stick coating.

Add the minced garlic and the rice and stir for another minute or two. Make sure to coat all of the grains of rice in the butter because this will keep the grains from sticking together. Add the salt, pepper, and paprika. Stir to combine.


Now, add the water and chicken-flavored bouillon and stir to combine with the rice.

Here comes the magic!
Close the lid on your pressure cooker and be sure the valve is set to Seal. Select Manual/High Pressure and set the timer for 5 minutes. Then let the cooker do the work.
When the timer beeps, resist the urge to open it right away-the rice isn't ready just yet. Let the pressure release naturally for 15 minutes so the rice can finish cooking. After that, carefully turn the valve to Vent to release any remaining pressure.

Now open the lid, add the parsley, and fluff the rice with a wooden spoon. Doing so will prevent the rice from sticking together. Avoid using anything metal, such as a fork, because it will scratch the liner of your pressure cooker.

Fluff the rice and finish it with a sprinkle of fresh scallions. The result is simple, flavorful, and a big step up from plain white rice.
It's an easy side that feels a little elevated, the kind of dish that impresses. Best part? Just 30 minutes and one appliance.

Tips for Success
- Rinse your rice before cooking-it keeps the pilaf fluffy, not sticky.
- Don't skip toasting the orzo and onion-it's what gives pilaf its flavor.
- Wooden spoon > metal spoon when fluffing (saves your pot from scratches).
- Leftovers reheat better with a splash of broth or water.
Cooking for Two
Now that it's just the two of us at the dinner table, I don't always want a huge pot of leftovers sitting in the fridge. That's why I often make a smaller batch of this Pressure Cooker Rice Pilaf-just enough for dinner and maybe a little left for lunch the next day. The nice thing is you don't have to change the method at all. Simply cut the recipe in half, keep the cook time the same, and you'll end up with the perfect amount for two.
And if the kids are home or you're hosting friends, you can always make the full recipe, and it works just as well.
You will find the scaled-down version in the notes section of the recipe card below.
Frequently Asked Questions
Rice pilaf is cooked with aromatics and toasted pasta (like orzo), giving it a richer, nuttier flavor compared to plain steamed rice.
Yes, but increase cook time to 20-22 minutes on high pressure and use a little extra liquid.
Broken spaghetti, vermicelli, or even quinoa make good substitutions.
Rice, in general, tends to get dehydrated once you put it in the fridge. So, it never tastes as good as it does right off the heat, but you can store cooled rice pilaf in a tightly covered container in the refrigerator for about a week. Reheat it in the microwave or on the stovetop. If it seems dry, add a little broth or water and stir it frequently while it reheats.
Serving Suggestions
This rice pilaf goes with almost anything. Here are a few of my favorites:


Final Thoughts
This Pressure Cooker Rice Pilaf is one of those go-to side dishes you'll make again and again. It's quick, reliable, and always tastes like more effort than it actually takes. Perfect for busy weeknights, camping trips, or anytime you want to upgrade plain rice without too much extra work.
DID YOU MAKE THIS RECIPE?
I'd love to know how it turned out! Leave a review or snap a quick photo and tag me on Facebook.
Every time you share one of my recipes, it helps me grow this blog-and I'm so grateful for your support.
As always, I will be back next week with more delicious recipes from my RV kitchen to yours!
This post may contain affiliate links. Read my full disclosure policy.
Learn how to get Amazon deliveries straight to your RV.

Quick and Easy Pressure Cooker Rice Pilaf
Equipment
- 1 Pressure Cooker Instantpot, Ninja Foodi, this recipe will work in any type of pressure cooker.
Ingredients
- 1 cup long grain white rice-rinsed
- ¼ cup butter
- ⅓ cup orzo
- 1 ½ cups water with 2 teaspoons of Knorr Chicken Flavored Boullion mixed in
- 2 cloves garlic, finely minced
- 1 small onion, diced
- 1 teaspoon kosher salt
- ¼ teaspoon ground black pepper
- ¼ teaspoon paprika
- 1 tablespoon fresh minced parsley
Instructions
- Turn on the Instant Pot or Ninja Foodi and press the "Sauté" button. Add the butter to the pot.
- Once the butter has melted, add the chopped onions and saute for 2-3 minutes or until the onions are translucent.
- Stir in the orzo and stir continuously until it starts to turn golden brown.
- Add the minced garlic and the rice and stir for another minute or two, making sure to coat all of the grains of rice in the butter.
- Add the salt, pepper, and paprika. Stir to combine.
- Add the water and chicken-flavored bouillon and stir to combine with the rice.
- Close the lid of the pressure cooker making sure that the pressure valve is in the "Seal" position.
- Press the "Manual" button and set the timer for 5 minutes on high pressure.
- Once the timer goes off, let the pressure release naturally for 15 minutes.
- Carefully release any remaining pressure by turning the pressure valve to "Vent"
- Open the lid and fluff the rice with a wooden spoon. Add fresh chopped parsley and serve.
Notes
Recipe Notes - Cooking for Two
To make Pressure Cooker Rice Pilaf for Two, simply cut the recipe in half:- ½ cup long-grain white rice
- 2-3 tablespoons orzo
- 2 tablespoons butter
- ½ small onion, diced
- 1 garlic clove, minced
- 1 cup water with 1 teaspoon chicken bouillon (or broth)
- Pinch of paprika, salt, and pepper
- Fresh parsley or scallions for garnish


Alison Corey says
Absolutely, I'm always on the lookout for an elevated side dish, and your Quick and Easy Pressure Cooker Rice Pilaf recipe seems like the ideal choice! The promise of a fool-proof method instantly puts my mind at ease, knowing that I can create a gourmet side dish without the stress or hassle.
Dina and Bruce says
30 minutes is about all I have left in me when I get home, and THIS WAS THE RECIPE! YAY~!!!
Stacey says
I can't believe how quickly I can make rice pilaf in the pressure cooker. Easy to make and delicious! It's a game-changer for weeknight meals.
Carrie says
I have been looking for more recipes to make in my Ninja Foodi! 🙂 What a great side dish idea.
Amanda says
This rice was delicious. So simple to make and it really will go with anything! Beautifully fluffy too.
Ieva says
Great side dish - so quick and flavorful! Served it with baked chicken breasts last night and would definitely make this recipe again!
Patty says
I've had my pressure cooker for years and use it all the time but have yet to do so for rice - I was pleasantly surprised how easy this recipe was and how hands off it made making the side dish for dinner. Loved all the flavor too!
Mica says
This pilaf was SO easy to make and worked as both a side dish and the base of stir fry the next night!
Tasha says
I am amazed at how delicious and versatile this side is. Perfect for any meal, whether at home or in the RV. Quick to make, minimal cleanup. A new Household favorite and will take to our camping trip soon!
Kristine says
This rice pilaf is delicious. The rice was so soft and tender and so full of flavor. Great recipe!
Aiden says
My family LOVES rice and I get so bored of it when it's served plain every day. This recipe has been a great way for me to keep meals interesting, while still pleasing the rest of my family.
Kim says
Simple and so delicious! This one is a keeper.